Activity: Create an Animated Flip Book
March 27, 2020The following activity is part of our 14-day #eDLProjectShare series. The activity is extracted from our high school, Animation course, Unit 2: Hand-Drawn Animation.
Directions:
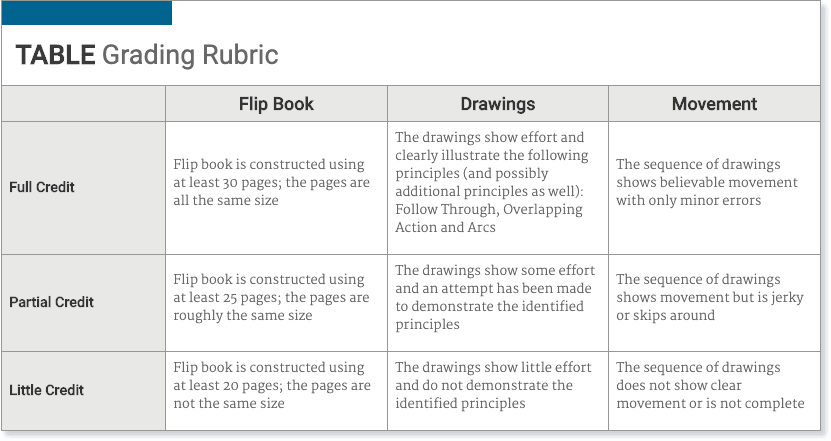
- Complete the following activity. Use the rubric located below the activity to assess how you are completing each of the required components.
- (Optional): Feel free to share your project progress or the final project with a short video or picture on Twitter or Facebook using the hashtag #eDLProjectShare @eDynamicLearning. *If you are under 18, you must have your teacher or parent or guardian’s permission to post.
- (Optional): For teachers and parents looking to use as a graded activity, a rubric worth 15 points is located at the bottom of the activity.
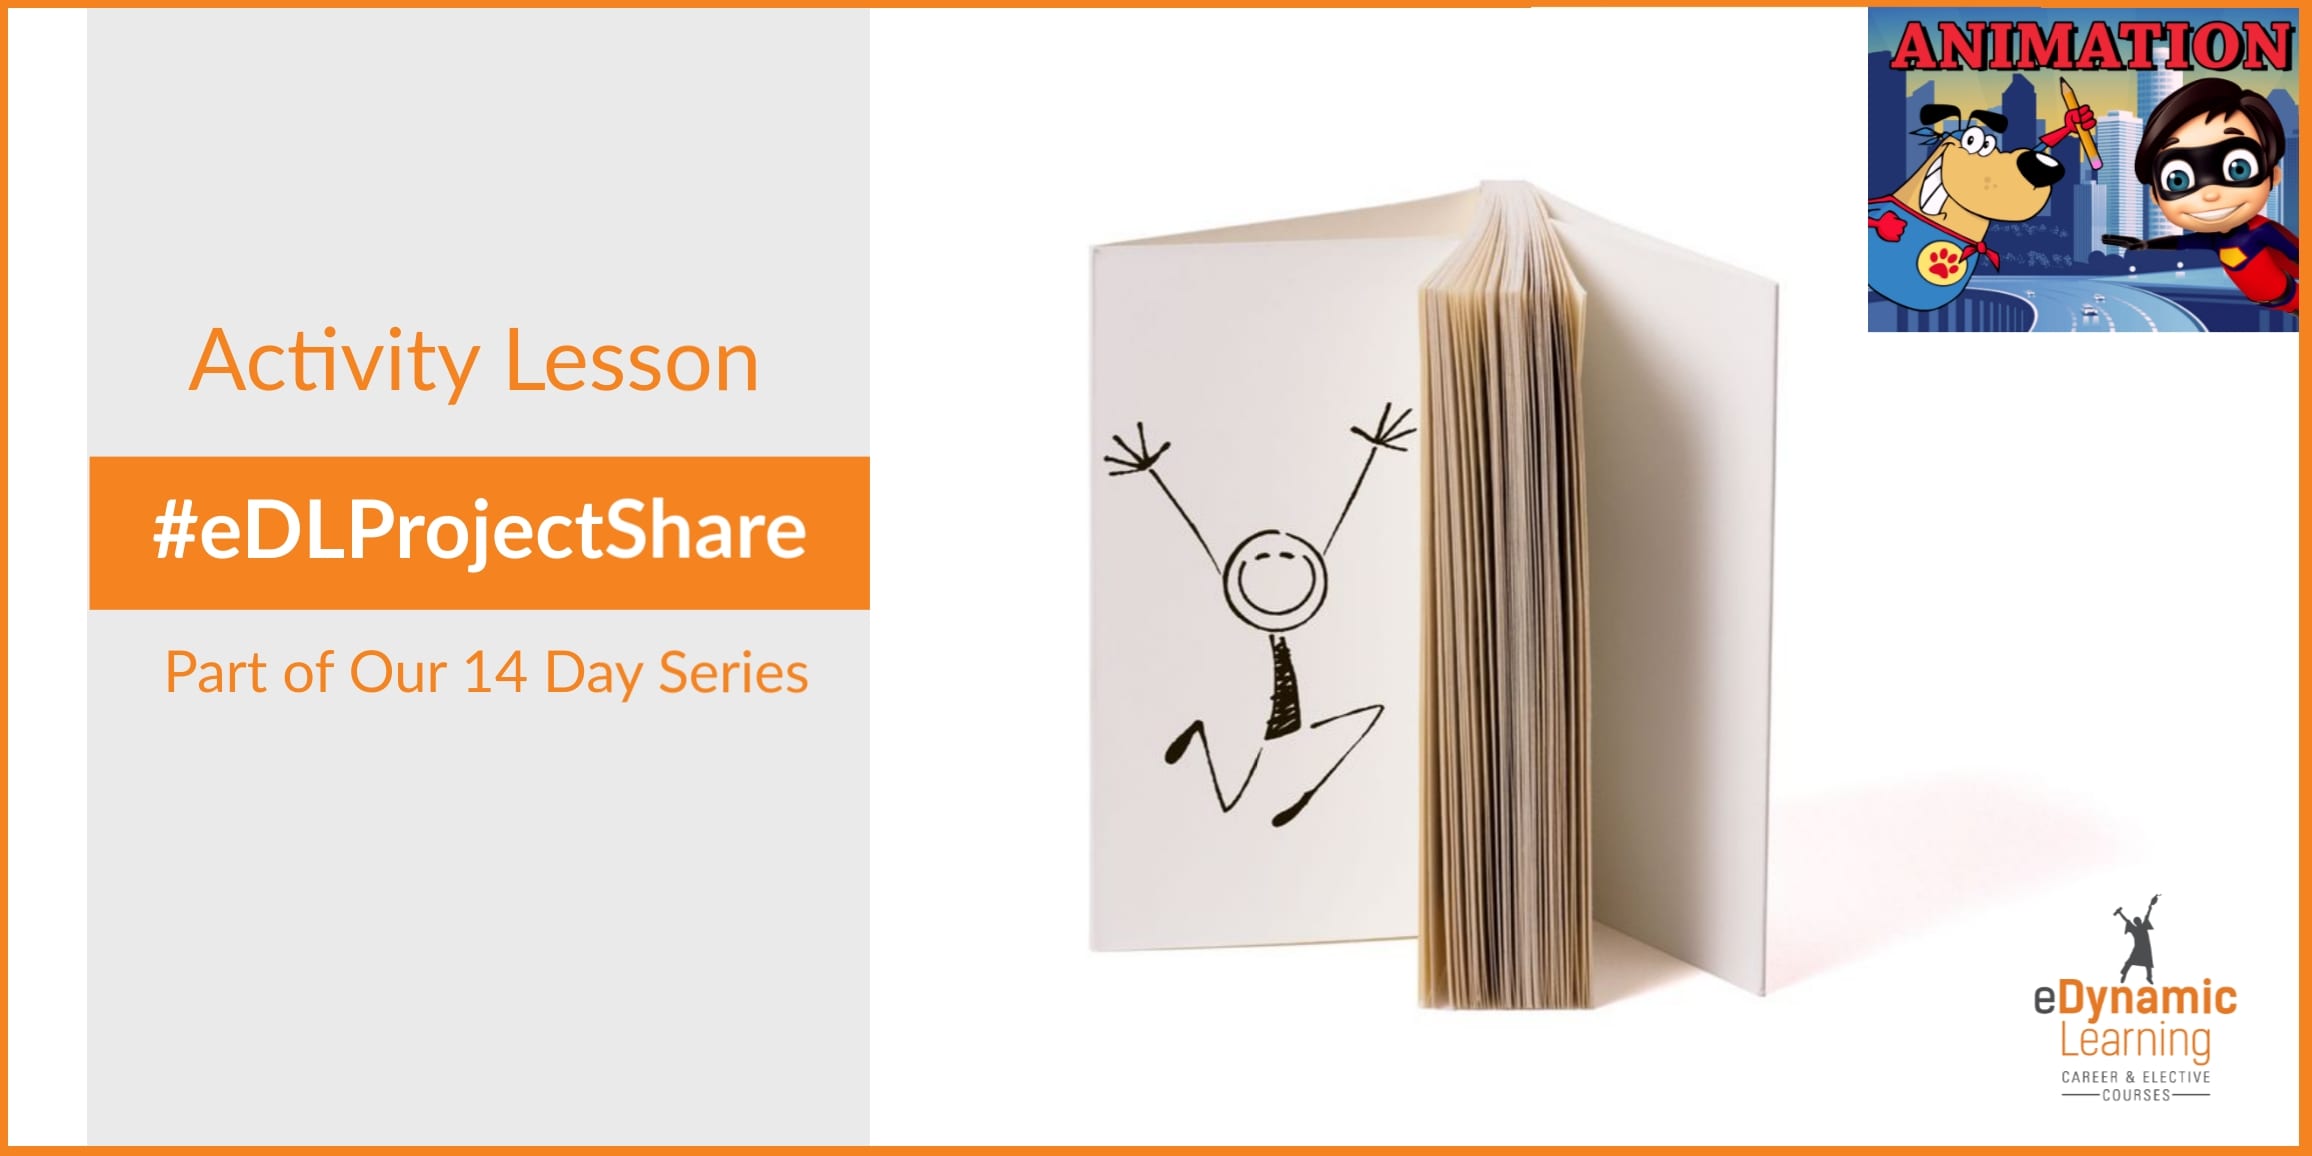
 Activity: Create an Animated Flip Book
This is a Student Choice and Voice activity, meaning that you get to choose which of the following Flip Books you would like to create! These are a fun way to practice your drawing skills and put the 12 Principles of Animation into practice.
Directions
- Read the Background Research, General Notes, and Materials Needed.
- Pick one of the Flip Book activities to complete. Of course, feel free to complete more than one!
Background Research:
The 12 Principles of Animation are the Did you know that the 12 Principles of Animation were made famous by two Walt Disney animators, Ollie Johnston and Frank Thomas? While these principles were developed in the 1930s, animators of today still follow them.
- Visit the Disney blog to learn about these 12 Principles of Animation in the context of Disney videos.
- The Art of Animation and Motion Graphics on PBS Learning Media.
- The 12 Principles of Animation YouTube video is another helpful visual.
General Notes:
Each flip book must have 30 pages or more.
If you have small pads of paper (like the type for small sticky notes), you will need to reinforce the edge that holds them together. You can do this using a binder clip, a rubber band, or heavy-duty staples. If you are starting with plain paper, cut it into small rectangles or squares, roughly 3” x 5” in size (you can make the same sized pieces by folding one page of paper into rectangles, unfolding it, putting it on top of additional pages and then cutting along the fold lines to get evenly sized pages). Stack the pages into the flipbook of 30 pages. Fasten the pages of the book together on one edge with a binder clip or heavy-duty stapler.
Draw by starting at the back page of your flip book.
Materials Needed:
-
- Paper & scissors or small pads of paper with at least 30 pages (one for each book you decide to make)
- Pencil and eraser
- Binder clips, rubber bands, or heavy-duty stapler
Flip Book 1: Ball Bouncing
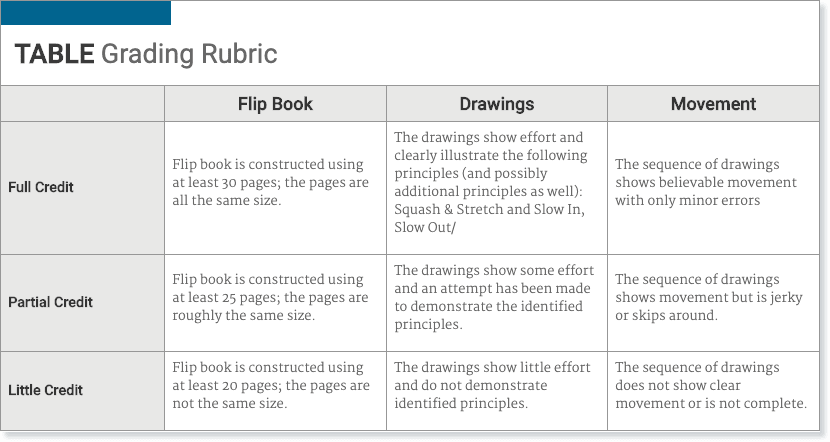
Starting from the back page of your flip book, draw a ball coming onto the page and bouncing off an imagined surface. Use the principles of Squash and Stretch to change the shape of your ball as it moves. Use the principle of Slow In, Slow Out to vary the speed of your ball bouncing.
Use the following rubric to assess your work.
Flip Book 2: Ball Bouncing
Again, start from the back page. This time, draw a stick figure moving. Your stick person can try walking, jumping, doing a little dance, or any simple body movement. Use the principles of Follow Through and Overlapping Action to show how some parts of the body move more slowly than others. Use the principle of Arcs to make sure that motions travel in curved lines rather than straight lines.
Use the following rubric to assess your work.
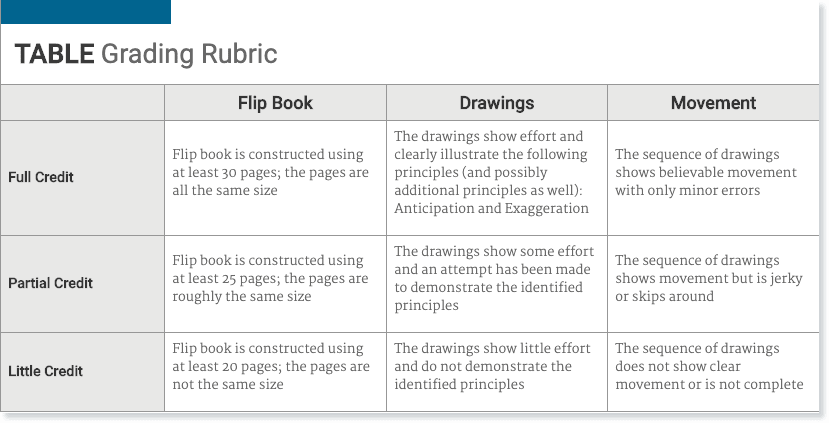
Flip Book 3: Facial Expressions
Draw a simple face (remember to start from the back page!) and make the expression change. For example, the character may go from a frown to a smile or become surprised. Use the principle of Anticipation to precede a facial change with a slight movement in the opposite direction. Use the principle of Exaggeration to make your character’s face or expression compelling. And don’t forget—people blink!
Use the following rubric to assess your work.
